Replacement Parts for Pressure Cannner (pressure canner)

Pressure canner - PRESTO® Canner parts are available at most hardware and appliance stores. When ordering parts, please specify the seven digit model number found stamped on the side of the canner body.

1. PRESSURE DIAL GAUGE
The pressure dial gauge registers pressure in both pounds (outer scale) and metric measure (inner scale). The pointer moves around the dial indicating the pressure within the unit. The dial gauge is a delicate instrument which must be handled with care. Before first use, it will be necessary to assemble the dial gauge properly and attach it to the canner cover. The pressure dial gauge needs to be checked for accuracy prior to each canning season and if any of the following conditions exist: cover has been submerged in water or dropped, gauge glass is broken or has fallen out, parts are rusty, pointer is not in the “0” block, or if you believe the gauge may not be accurate.The gauge can usually be checked at your local county extension office. If you are unable to have your dial gauge checked locally, carefully
remove and package the gauge and send it to the Presto Consumer Service Department. See Service Information on page will be posts. An accurate gauge is necessary to help prevent food spoilage and possible food poisoning.

2. PRESSURE REGULATOR
The pressure regulator is a solid one-piece unit. Pressure readings on the pressure
canner are registered only on the pressure gauge (see above) and can be controlled and maintained by adjusting heat settings.

3. VENT PIPE
The pressure regulator fits over the vent pipe and allows excess pressure to be released.

4. AIR VENT/COVER LOCK
The air vent/cover lock automatically “vents” or exhausts air from the canner and acts as a visual indication of pressure in the canner. The small gasket must be in place for the air vent/cover lock to seal completely.

5. LOCKING BRACKET
The locking bracket on the inside of the canner body engages with the air vent/cover lock to prevent the cover from being opened when there is pressure in the unit.

6. SEALING RING
The sealing ring fits into the canner cover and forms a pressure-tight seal between the cover and body during canning and cooking.

7. OVERPRESSURE PLUG
The overpressure plug is located in the canner cover. It will automatically pop out and release steam in case the vent pipe becomes blocked and/or clogged and pressure cannot be released normally.

8. CANNING-COOKING RACK
The canning-cooking rack is placed in the bottom of the canner to hold jars off the bottom of the unit while canning. When cooking, the rack is used for steaming foods. It can also be used to hold foods such as vegetables out of the cooking liquid which allows several foods to be cooked at the same time without an intermingling of flavors. When it is desirable to blend flavors, do not use the canning-cooking rack. The canning-cooking rack must always be used when canning.
pressure canner
>>>>Read More....Click Here

Pressure Canner Related Posts:


How to Use Your Canner (pressure canner)

Pressure canner - IMPORTANT: Read carefully. Do not attempt to use your Pressure Canner before reading these instructions.

* Before using your canner for the first time, clean according
to the instructions on page Before Using Canner for the First Time (pressure canner).

* Be sure the vent pipe is open before each use by holding the cover up to the light and looking through the vent pipe. If the vent pipe is blocked, excess pressure cannot be released through it. Pressure may then build to unsafe levels. Pressure will continue to build until the overpressure plug is forced out of its cover opening. Therefore, clean the vent pipe with a small brush or pipe cleaner if it is blocked.

* The correct pressure for canning and cooking is indicated by the pressure dial gauge. Pressure is indicated on the gauge which registers the pressure inside the unit at all times. The pointer will move across the dial as pressure is developed or reduced within the canner. The pressure regulator is designed to rock only at 15 pounds pressure.

* Do not strike the rim of the canner body with any cooking utensil as this will cause nicks which may damage the rim and allow steam to escape.

* Use the canner on a level burner and range only. Use on a tilted burner or range may interfere with the operation of the pressure regulator.

* Pouring water into a dry overheated canner may crack the metal.

* The canner has been designed so the cover will go on in only one position and rotate in only the directions indicated for closing and opening. Press down on the cover handles to compress the sealing ring and make the cover easier to close. The cover has the words CLOSE V OPEN embossed on the top surface near a cover handle. Align the “V” on the cover with the mark on the body handle for proper cover and body alignment. Turn the cover in the direction indicated to close until the cover handles are centered directly above body handles. Do not rotate cover beyond this point.

When the cover is rotated to the closed position, the air vent/cover lock passes under the locking bracket. When the handles are aligned, one over the other, the pressure regulator is placed on the vent pipe, and heat is applied, pressure will begin to build within the canner. At this point, the air vent/cover lock lifts and locks the unit. The cover will remain locked as long as there is pressure in the canner. When pressure is completely reduced, the air vent/cover lock drops allowing the canner to be opened. If the cover is not rotated sufficiently (cover handles directly above body handles), the air vent/cover lock will only raise slightly and steam will continue to flow from it, preventing pressure from building.

* (During canning, it is necessary to exhaust air from the canner before placing the pressure regulator on the vent pipe. See page How to Pressure Can Foods. (pressure canner), step 7.) The pressure regulator is placed on the vent pipe as soon as the cover is closed securely when cooking. During canning or cooking, moisture may appear near the pressure regulator, overpressure plug and air vent/cover lock. This is normally due to condensation. This does not affect operation of the canner.

To reduce pressure at the end of the canning or cooking period, turn heat off and/or remove the canner from the burner. Cool according to instructions in recipe. Pressure is completely reduced when the air vent/cover lock has dropped and no steam escapes when the pressure regulator is tilted. Do not remove the pressure regulator until pressure is completely reduced. Always remove the pressure regulator before opening canner.

If the air vent/cover lock remains in its raised position, there may still be pressure in the canner. Do not remove the pressure regulator until the air vent/cover lock drops and no steam escapes when the pressure regulator is tilted. The cover should not be forced open. You may tap the air vent/cover lock lightly with a spoon. If pressure is present, steam will escape and the air vent/cover lock will pop back up. Continue to cool the canner until the air vent/cover lock drops.

HELPFUL HINT: To help yourself understand the operation of the pressure canner and cooker, pour 4 cups of water into the canner and follow the step-by-step instructions beginning with step 5 on page Pressure Can Foods. (pressure canner). For actual usage of the canner/cooker, follow the complete instructions beginning at the bottom of next column for pressure canning and on page will be posts later..:D
pressure canner
>>>>Read More....Click Here

Pressure Canner Related Posts:


General Directions For Canning Tomatoes in a Boiling Water Bath (pressure canner)

Pressure canner - Caution! Altitude Adjustments.

•The times given in this publication for processing tomato products are for canning in the Edmonton area (Edmonton’s altitude is 2200 ft/671 m).

•If canning outside the Edmonton area, adjustments in time and pressure may be necessary for different altitudes. For altitudes higher than 3000 ft/914 m (Banff, Calgary, Jasper, Lethbridge areas), add 5 minutes to sterilizing and boiling water bath processing times. Please contact the ATCO Blue Flame Kitchen for more information.

Sterilizing Jars
•Use only commercial canning jars; they are made of tempered glass that can withstand the heat of processing. Discard any jars with chips and cracks.

•To sterilize jars, place on rack in canner and cover with water. Bring to a boil and boil for 15 minutes at altitudes of 1001 - 3000 ft (Edmonton’s altitude is 2200 ft/671 m). (See Caution! Altitude Adjustments.)

•Sterilizing jars in an oven or dishwasher is not recommended. Heating glass jars in an oven subjects them to uneven temperature extremes and can result in breakage. Dishwasher temperatures may not be high enough or time period long enough for sterilizing jars.

Preparing Lids
•Two part metal canning lids need to be prepared before using. Refer to specific manufacturer's instructions on treating lids.

•Lids can be used only once but screw bands can be reused as long as they are in good condition.

•Do not reuse lids from commercially canned foods for home canning.

Preparing Tomatoes
•Select disease-free, preferably vine-ripened, firm tomatoes. Do not use tomatoes from dead or frost-killed vines.

•Prepare tomatoes according to instructions in recipes.

•Prepare only the amount of tomato or tomato product that can be processed at one time.

Filling Jars
•Tomatoes may be packed raw or preheated and packed hot into jars. Follow specific directions as given in each recipe.

•If given a choice, the hot pack method produces a higher quality product.

•Fill hot sterilized jars, one at a time, leaving specified headspace.

•To remove air bubbles, slide a nonmetallic utensil, such as a narrow rubber spatula or plastic knife, between food and sides of jar. Add more liquid to obtain proper headspace, if necessary.

•Wipe jar rims thoroughly with a clean damp cloth.

•Place heated lid on jar. Screw two part metal canning lids down fingertip tight; do not adjust lids after processing. Screw metal bands with glass lids down tightly and then turn back 1/2 inch; retighten band when jar is removed from canne
pressure canner
>>>>Read More....Click Here

Pressure Canner Related Posts:


How to Preserve Tomatoes With a Pressure Cooker/Canner (pressure canner)

Pressure canner - Using a pressure cooker/canner to bottle your tomatoes is a great way to preserve your crop and stretch your fresh tomatoes into the winter. Bottling your tomatoes at home will give you the same fresh-from-the-garden flavor that you enjoy throughout the summer. Just follow these steps.

Instructions

Things You’ll Need:

* Tomatoes
* Jars
* Rings
* Lids
* Knife
* Pots
* Pressure Cooker
* Soap
* Dishwasher
* Tongs
* Water


Step1
Check jars for cracks and chips. Jars that show signs of wear could break during processing. Jars that have even the tiniest chips should not be used.

Step2
Sterilize lids and bands. Bring a pot of water to a boil, and place the lids and bands in the boiling water. Reduce the heat to low, and allow the lids and bands to remain in the water until you need them.

Step3
Sterilize your jars by running them through the dishwasher with a hi-temperature dry cycle. If you do not have a dishwasher, wash the jars in hot soapy water. Rinse them, and then pour boiling water into the jars. Cool and drain the water.

Step4
Remove tomato skins. Bring a large pot of water to a boil. Dip the tomatoes in the boiling water until the skins become loose. Immediately put the tomatoes into an ice water bath, and the skins will slide right off. Cut the difficult pieces off with a knife.

Step5
Prepare the tomatoes. Garden fresh tomatoes can be put into the jars whole. If you desire cut tomatoes, dice them and then place in the jar. For saucy tomatoes, puree them in a blender or food processor. Leave 1/2-inch of space at the top of the jar.

Step6
Carefully remove the lids and rings from the boiling water with metal salad tongs. Rinse the lids and rings in warm water to cool them down if they are still hot. Wipe the mouth of the canning bottle clean, and then place the lid and ring on the jar. Tighten the ring firmly, but not so tight as to crack the jar.

Step7
Place the jars in the pressure cooker. Add the correct amount of water, according to your individual pressure cooker's guide. Place the lid on the cooker and process according to individual cooker guidelines. Allow the pressure cooker to cool completely before removing the lid.
pressure canner

Tips & Warnings

* Remove skins from tomatoes and freeze immediately after picking from the garden. Thaw the tomatoes, and process all tomatoes at one time.

* Use caution when handling a pressure cooker. Manufacturer instructions should be followed carefully.

* Use caution working with hot water. Boiling water will cause extremely painful burns.

* Do not bottle tomatoes while around young children. They can be burned easily.
pressure canner
>>>>Read More....Click Here

Pressure Canner Related Posts:


Before Using Canner for the First Time (pressure canner)

Pressure canner -
1. Remove the air vent/cover lock from the canner cover. The cup portion of the air vent/cover lock, on the inside of the cover, unscrews from the pin.

2. Remove the sealing ring by simply pulling it from the sealing ring groove.

3. Remove the overpressure plug by pushing it out of its opening from the top of the cover.

4. Wash the cover and body with hot, sudsy water. Do not submerse the cover in water or let the gauge come in contact with any liquid. The inside mechanism of the gauge may be damaged if it is submersed or if water is allowed to run over it. Scrub the sealing ring groove to remove the manufacturing oils.

5. Reinsert the air vent/cover lock making sure the small gasket is in place.

6. Reinsert the overpressure plug by pushing the domed side of the plug into the opening from the underside of the cover, until the bottom edge is fully and evenly seated against the underside of the cover. When the overpressure plug is properly installed, the word (TOP) will be visible on the overpressure plug when viewing the outside of the cover.

7. Replace the sealing ring in the sealing ring groove, making certain to fit the ring under the stop tab located on the inside rim of the cover.

8. The sealing ring is prelubricated; therefore, do not apply cooking oil to it. If necessary, to help make the cover easier to open and close, a very light coating of cooking oil may be applied to the underside of the body lugs. IMPORTANT: Never oil the sealing ring. Cooking oil will swell and soften the sealing ring, reducing the usable life and require frequent replacement. The cover should open and close easily when following the instructions in the next column.

9. Attach the dial gauge to the canner cover. To do this, remove the nut and metal washer from the threaded end of the dial gauge, leaving the rubber washer in place. From the top of the cover, insert threaded end of gauge through the hole in the center of the cover, until metal base rests on cover. While holding the gauge in place, carefully turn cover over and place metal washer, then nut, on threaded end of gauge and tighten.
pressure canner >>>>Read More....Click Here

Pressure Canner Related Posts:


Pressure Canning Poultry (pressure canner)

Pressure canner - Pressure canning is the only safe method for canning poultry.

Cut poultry into convenient pieces for packing and precook until medium done or until pieces, when cut, show almost no pink color at the bone.

Precook by boiling in water or in a concentrated broth for more flavor. Make broth from bones and bony pieces, neck, back, and wing tips. Pack hot meat in clean, hot Mason jars, leaving 1 inch head space. Do not pack food tightly.

Poultry may be processed with or without salt. If salt is desired, use only pure canning salt. Table salt contains a filler which may cause cloudiness in bottom of jar. Use 1⁄2 teaspoon salt to each pint, 1 teaspoon to each quart. If you are on a salt free diet, salt may be omitted.

Follow step-by-step directions from oldest post for canning procedure. Process poultry according to the following recipes.
pressure canner >>>>Read More....Click Here

Pressure Canner Related Posts:


What Foods Are Typically Processed/Preserved Using a Pressure Canner and Why? (pressure canner)

Pressure canner - Low acid foods require a higher temperature when processing than can be reached by placing them in jars
immersed by boiling water. To kill harmful bacteria (such as those associated with botulism) use of pressure canning ensures the safety of the preserved produce. Foods such as red meats, sea food, poultry, milk, and all fresh vegetables, with the exception of most tomatoes, fit into the low acid group since they have an acidity, or pH level, of 4.6 or higher. The temperature which must be reached and maintained(for a specified amount of time) to kill the bacteria is 240EF. This temperature can be reached only by creating steam under pressure.

Becoming Familiar With the Parts of a Pressure Canner


pressure canner, pressure canners
Older model pressure canner (made before 1970) were heavy-walled kettles with clamp-on or turn-on lids fitted with a dial-type gauges. A vent port, in the form of a petcock or counterweight, and a safety fuse were also present. Modern pressure canner are lightweight, thin-walled kettles and most have turn-on lids. They usually have a perforated metal rack or basket with handles, rubber gasket, a dial or weighted gauge, an automatic vent/cover lock, a vent port (steam vent) to be closed with a counterweight or weighted gauge, and a safety fuse.

Note: When purchasing a used pressure canner, make certain all parts are accounted for and in good condition. It is nearly impossible to find replacement parts for older models.
pressure canner >>>>Read More....Click Here

Pressure Canner Related Posts:


Water bath canners are faster for higher acid foods. (pressure canner)

Pressure canner - Although pressure canner may also be used for processing higher acid foods, boiling-water canners are recommended for this purpose because they are faster. A pressure canner would require from 55 to 100 minutes to process a load of jars; while the total time for processing most acid foods in boiling water varies from 25 to 60 minutes. A boiling-water canner loaded with filled jars requires about 20 to 30 minutes of heating before its water begins to boil.

A loaded pressure canner requires about

* 12 to 15 minutes of heating before it begins to vent;
* another 10 minutes to vent the canner;
* another 5 minutes to pressurize the canner;
* another 8 to 10 minutes to process the acid food; and, finally,
* another 20 to 60 minutes to cool the canner before removing jars.

But Water Bath Canners cannot be used for meats, dairy, sea food, poultry, vegetables and many fruits.

pressure canner, pressure cooker canner, pressure canner cookerAnd the food quality and storage time is better with a pressure canner. Because they get hotter (240F vs 180F-212F) pressure canners result in a better flavor and the ability for to store for a longer time.

A pressure canner can be used as a boiling water bath canner, just remove the gauge and weight. That way you have 2 canners in one!

Conclusion: Pressure canner cost more to buy, but ultimately, you can "can" more foods in them, store the foods longer, and use the same canner as a pressure canner or without sealing the lid, as a boiling water bath canner.
>>>>Read More....Click Here

Pressure Canner Related Posts:


How to Pressure Can Foods. (pressure canner)

Pressure canner-
Follow these step-by-step instructions for pressure canning in your canner. Prepare food according to the directions in specific recipe.

pressure canner, pressure cooker canner, pressure canner cooker1. The first step in pressure canning is to assemble the canning equipment. Be sure your canner is thoroughly cleaned and working properly. Before each canning season, check the pressure gauge for accuracy. Also check the sealing ring, overpressure plug, and the rubber gasket of the air vent/cover lock. Replace these parts when they become hard, deformed, cracked, worn, pitted, or unusually soft.

2. Check Mason jars for nicks, cracks, and sharp edges. Check bands for dents or rust. Use only jars, lids, and bands in perfect condition so an airtight seal may be obtained. Wash and rinse jars, lids, and bands. Pour hot water into jars and set aside until needed. Follow closure manufacturer’s directions for bands and lids.

3. Select fresh firm food. Sort food according to size. Clean food thoroughly. Prepare according to recipe. Fill hot Mason jars promptly with food and liquid to recommended level. Allow 1⁄2 inch head space for fruits. ALL vegetables and meats require 1 inch head space due to expansion during processing. Work out air bubbles with a clean nonmetallic spatula. Wipe sealing edge clean with a damp cloth. Adjust caps according to closure manufacturer’s directions.

4. Place three-quarts of boiling water, canning rack, and jars in canner. To prevent water stains on jars, add 2 tablespoons white vinegar to water in canner. Always use canning rack. Jars may break if set directly on bottom of canner.

5. Look through the vent pipe to be certain it is open before placing cover on canner. To clean the vent pipe, draw a pipe cleaner or small brush through the opening.

6. Place cover on canner, aligning the “V” on the cover with the mark on the body handle and lock securely by turning in the direction indicated to close (clockwise). Cover handles must be centered over body handles. Do not force beyond this position.

7. Exhaust air from the canner and jars by adjusting heat to a relatively high setting to obtain a free flow of steam from the vent pipe. Consult the instruction book which accompanied your range for recommended heat setting. Reduce heat to maintain a moderate steam flow. Allow steam to flow for 7 to 10 minutes when canning.

8. Place pressure regulator on vent pipe. Set burner at a relatively high heat setting, on most range burners, and heat canner until pressure dial gauge registers desired pressure.

9. Processing time begins when pressure gauge registers the correct pressure. Adjust heat to maintain correct pounds pressure on the pressure gauge.

10. At end of processing time, turn burner to “OFF” or remove canner from heat source. Let pressure drop of its own accord, do not quick-cool. Pressure is completely reduced when the air vent/cover lock and overpressure plug have dropped and no steam escapes when the pressure regulator is tilted. Do not use the pressure dial gauge as an indicator for when pressure is completely reduced. Attempting to speed the cooling of the canner by laying wet cloths on the cover, placing the canner in water, or setting the canner in a draft or on a cold surface is not recommended. If the pressure in the canner is reduced more rapidly than the pressure in the jars, the jars may break.

11. When pressure has been completely reduced, remove pressure regulator from vent pipe and let canner cool for 10 minutes. Do not remove the pressure regulator until pressure is completely reduced and the air vent/cover lock has dropped. Always remove pressure regulator before opening the cover.

12. To remove cover, turn counter-clockwise until cover hits stop. Cover handles will be beyond the body handles. If cover seems to stick or is hard to turn, do not force it open. Sticking may indicate that there is still pressure inside the canner. If in doubt about pressure being completely reduced, let the canner stand until cool before removing the cover.

13. Lift canner cover toward you to keep steam away from you when opening.

14. Remove jars from canner. Set jars apart on board or cloth away from draft to cool. When jars are cold, test seal, remove bands, wipe jars, label, date, and store in a cool, dry place.
pressure canner

IMPORTANT: Do not attempt to use your canner before reading these instructions. >>>>Read More....Click Here

Pressure Canner Related Posts:


Pressure Canning. (pressure canner)

Pressure canner
The United States Department of Agriculture, Washington, D.C. recommends the Pressure Canner as being the only safe method for canning low-acid foods—vegetables, meats, and poultry.

There are invisible microrganisms present all around us. Fruits, vegetables, and meat contain these microrganisms naturally, and yet, they are not a problem unless food is left to sit for extended periods of time, causing food spoilage. This is nature’s way of telling us when food is no longer fit to eat.

There are four basic agents of food spoilage—enzymes, mold, yeast, and bacteria. Canning interrupts the natural spoilage cycle so food can be preserved safely. Molds, yeast, and enzymes are destroyed at temperatures below 212˚F, the temperature at which water boils (except in mountainous regions). Therefore, boiling water processing is sufficient to destroy those agents.

Bacteria, however are not as easily destroyed. The bacteria, Clostridium botulinum produces a spore that makes a poisonous toxin which causes botulism. This spore is not destroyed at 212˚F. In addition, the bacteria thrive on low-acids in the absence of air. For a safe food product, low-acid foods need to be processed at 240˚ or higher, temperatures only achieved with a pressure canner.

In pressure canning, some of the water in the pressure canner is converted to steam, which creates pressure within the canner. As pressure increases, temperature increases, 5 pounds pressure—228˚F, 10 pounds pressure—240˚F, 15 pounds pressure—250˚F. This pressurized heat destroys the potentially harmful bacterial spores. As the jars cool, a vacuum is formed, sealing the food within and preventing any new microorganisms from entering and spoiling the food.

As a safeguard against using canned foods which may be affected with spoilage that is not readily detected, pour all low-acid foods (meats and vegetables) into a saucepan and boil 10 to 15 minutes before tasting or using.

Many times odors that cannot be detected in the cold product will become evident by these methods. If, after boiling, food does not smell or look right, discard it without tasting.

MASON JARS: While there are many styles and shapes of glass jars on the market, only Mason jars are recommended for home canning. Mason jars are available in 1⁄2 pint, pint, and quart capacities with threads on which a cap may be screwed.

CLOSURES FOR MASON JARS: The two-piece metal cap consists of a flat metal lid held in place with a screw band. A rubber compound on the underside of the lid forms a seal during processing. Follow the closure manufacturer’s directions
for using the two-piece cap and for testing for a proper seal. If the closure has not sealed, completely reprocess or use the food immediately.
pressure canner >>>>Read More....Click Here

Pressure Canner Related Posts:


Pressure Canning Fish and Seafood. (pressure canner)

Pressure canning is the only safe method for canning fish and seafood.

Only fresh fish should be canned and these should be bled and thoroughly cleaned of all viscera and membranes when caught, or as soon as possible. Canning should be restricted to proven varieties where it is definitely known that a product of good quality may be obtained.

pressure canner, pressure cooker canner, pressure canner cookerFollow step-by-step directions from oldest post how to pressure can food. Process fish and seafood according to the following recipes.
pressure canner >>>>Read More....Click Here

Pressure Canner Related Posts:


Pressure Canning Meat. (pressure canner)

Pressure canning is the only safe method for canning meat.

All meat should be handled carefully to avoid contamination from the time of slaughtering until the products are canned. Animals should be correctly slaughtered, canned promptly or kept under refrigeration until processed. If you slaughter your own meat, contact your local county agricultural agent for complete information
on slaughtering, chilling, and aging the meat.

Keep meat as cool as possible during preparation for canning, handle rapidly and process meat as soon as it is packed. Most meats need only be wiped with a damp cloth. Use lean meat for canning; remove most of the fat. Cut off gristle and remove large bones. Cut into pieces convenient for canning.

Prior to processing, all meat may be boiled, broiled, fried, or roasted until rare.

Prepare a concentrated broth from the bones and meat trimmings. This broth is excellent for precooking meat by boiling and for pouring over meat in Mason jars.

Meat should not be browned with flour nor should flour be used in the broth to make gravy for pouring over the packed meat. Pack hot meat loosely, leaving 1 inch head space in Mason jars.

Meats may be processed with or without salt. If salt is desired, use only pure canning salt. Table salt contains a filler which may cause cloudiness in bottom of jar. Use 1⁄2 teaspoon salt to each pint, 1 teaspoon to each quart. More or less salt may be added to suit individual taste. If you are on a salt free diet, salt may be omitted.
Follow step-by-step directions beginning on page 5 for canning procedure. Process meats according to the following recipes.

When pressure canning at altitudes of 2,000 feet or below, process according to specific recipe. When canning at higher altitudes, process according to the following charts.

Altitude chart for canning meat, poultry, fish, seafood, and soup
Altitude-----------------Pints and Quarts
2,001 – 4,000 ft.----- 12 lbs. 12 lbs.
4,001 – 6,000 ft.----- 13 lbs. 13 lbs.
6,001 – 8,000 ft.----- 14 lbs. 14 lbs.
Processing time is the same at all altitudes.
pressure canner >>>>Read More....Click Here

Pressure Canner Related Posts:


Serious errors in processes obtained in pressure canner. (pressure canner)

Serious errors in processes obtained in pressure canner can occur if any of the following conditions exist:

* The altitude at which the canner is operated is above sea level and adjustments in pressure are not made. Internal canner pressures (and therefore temperatures) are lower at higher altitudes. Canners must be operated at increased pressures as the altitude increases. Check reliable canning instructions for altitude adjustments.

* Air is trapped in the closed canner during the process. Air trapped in a pressure canner lowers the temperature obtained for a given pressure (for example, 10 or 15 pounds pressure) and results in underprocessing. To be safe, USDA recommends that all pressure canners must be vented 10 minutes before they are pressurized.

To vent a canner, leave the vent port (steam vent) uncovered (or manually open the petcock on some older models) after you fill the canner and lock the canner lid in place. Heat the canner on high until the water boils and generates steam that can be seen escaping through the open vent port or petcock. When a visible funnel-shape of steam is continuously escaping the canner, set a timer for 10 minutes. After 10 minutes of continuous steam, you can close the petcock or place the counterweight or weighted gauge over the vent port to begin pressurizing the canner. (See steps 3 and 4 below.)

* An inaccurate dial gauge is used. Dial gauges should be checked for accuracy each year before use. If the gauge reads high or low by more than two pounds at 5, 10 or 15 pounds pressure, replace it.

Clean lid gaskets and other parts according to the manufacturer's directions. Use only canners that have the Underwriter's Laboratory (UL) approval to ensure their safety.
pressure canner >>>>Read More....Click Here

Pressure Canner Related Posts:


Pressure Canning Vegetables. (Pressure Canner)

Pressure canning is the only safe method for canning vegetables.

Young, tender, fresh vegetables, slightly immature, are better for canning than those which are overripe. As a rule, vegetables are best if canned immediately after picking, since flavor decreases upon standing and often unpleasant color changes take place. Avoid bruising vegetables because spoilage organisms grow more rapidly on bruised vegetables than on unblemished ones.

Wash and prepare garden fresh vegetables as you would for cooking.
To raw pack vegetables, simply place the prepared vegetables into clean Mason jars and cover with boiling water.

To hot pack vegetables, precook in boiling water until heated through. Pack pre-cooked vegetables into clean, hot Mason jars and cover with boiling water. Whenever possible, the precooking water should be used as liquid to cover the vegetables after packing into Mason jars. However, there are a few vegetables, such as greens and asparagus, which make the cooking water bitter and undesirable to use.

When packing vegetables, leave 1 inch head space in Mason jars.

Foods may be processed with or without salt. If salt is desired, use only pure canning salt. Table salt contains a filler which may cause cloudiness in bottom of jars. Add 1⁄2 teaspoon canning salt to each pint jar, 1 teaspoon to each quart jar, if desired.

Follow step-by-step directions beginning on page 5 for canning procedure. Process specific vegetables according to the following recipes.

When pressure canning at altitudes of 2,000 feet or below, process according to specific recipe. When canning at higher altitudes, process according to the following chart.

Altitude chart for canning vegetables

Altitude---------------Pints and Quarts
2,001 – 4,000 ft.--- 12 lbs. 12 lbs.
4,001 – 6,000 ft.--- 13 lbs. 13 lbs.
6,001 – 8,000 ft.--- 14 lbs. 14 lbs.
Processing time is the same at all altitudes.

pressure canner >>>>Read More....Click Here

Pressure Canner Related Posts:


Canning Fruits and Tomatoes with Pressure Canner. (Pressure Canner)

Foods high in acidity (fruits and tomatoes) may be processed using pressure canning or boiling water canning. The pressure processing method for fruits and tomatoes gives a heat treatment equivalent to the much longer processing time required with the boiling water canning method.

Select firm, fully-ripened but not soft fruit or tomatoes. Do not can overripe foods. Some fruits tend to darken while they are being prepared. To prevent the darkening, place fruit in an ascorbic acid solution (1 teaspoon ascorbic acid to 1 gallon water) or use ascorbic acid or citric acid mixtures according to package instructions.

Although fruit has better color, shape, and flavor when it is canned with sugar, it may be canned unsweetened if desired. Sugar is used for flavor. It is not used in a high enough concentration to act as a preservative. White sugar is preferable to brown sugar for canning. Light corn syrup or honey may be used to replace up to one-half the sugar.

If you wish to use sugar substitutes, follow package instructions. The amount of sugar desirable to use in preparing syrups will depend upon the tartness of the fruit and on family preference. It should be remembered that fruit, when heated, releases some of its juices which will dilute the syrup in proportion to the juiciness of the fruit.

Heat sugar with water or juice until sugar is dissolved. Add fruit and cook until heated through. Pack fruit into clean Mason jars to within 1⁄2 inch of top of jar. Cover with hot liquid leaving 1⁄2 inch head space. The liquid may be syrup, fruit juice, or plain water. For steps on boiling water canning, refer to page 13.

When pressure canning at altitudes of 2,000 feet or below or boiling water canning at altitudes of 1,000 feet or below, process according to specific recipe. When canning at higher altitudes, process according to the following charts.

Altitude chart for pressure canning fruit and tomato recipes
Altitude --------------Pints and Quarts
2,001 – 4,000 ft. ---7 lbs. 7 lbs.
4,001 – 6,000 ft. --- 8 lbs. 8 lbs.
6,001 – 8,000 ft. --- 9 lbs. 9 lbs.
Processing time is the same at all altitudes.

Altitude chart for boiling water canning fruit and tomato recipes
Altitude------------- Pints and Quarts
1,001 – 3,000 ft.--- increase processing time 5 minutes
3,001 – 6,000 ft.--- increase processing time 10 minutes
6,001 – 8,000 ft.--- increase processing time 15 minutes

pressure canner >>>>Read More....Click Here

Pressure Canner Related Posts:


Steps for Successful Steam-Pressure Canning. (Pressure Canner)

1. Put 2 –3 inches of hot water in canner. Place filled jars on the rack, using a jar lifter. Fasten canner lid securely.

2. Leave weight off vent port or open petcock. Heat at the highest setting until steam flows from the petcock or vent port.

3. Maintain high heat setting, exhaust steam 10 minutes, and then place weight on vent port or close petcock. The canner will pressurize during the next 3 to 5 minutes.

4. Start timing the process when the pressure reading on the dial gauge indicates that the recommended pressure has been reached, or when the weighted gauge begins to
jiggle/ rock.

5. Regulate heat under the canner to maintain a steady pressure at or slightly above the correct gauge pressure. If the pressure reading goes below the recommended pressure, you must bring the pressure back up and start the timing process over again from the beginning.

6. When timed processing is completed, turn off the heat, remove canner from heat (if electric range), and let the canner “depressurize” at room temperature (dial needle moves back to “0" or no steam sounds when weight is gently nudged). Do not force-cool the canner. Releasing pressure from a partially opened vent or placing the
canner under cool water will result in under-processing. It may also cause unsealed jars and loss of liquid from the jars. Quick-cooling can also warp the canner lid of older model canners.

7. After the canner is depressurized, remove the weight from the vent port or open the petcock. Wait 2 minutes, unfasten the lid, and remove it carefully. Lift the lid away from you so that the steam does not burn your face.

8. Remove jars with a lifter, and place on towel or cooling rack, if desired. Do not set on a cold surface or expose to breezy conditions.

pressure canner

Additional Safety/Operating Tips


Gauges: Check dial gauges for accuracy before use each year and replace if they read high by more than 1-2 pound pressure.
Gauges may be checked at most county Cooperative Extension offices. Replacement gauges and other parts for canners are often available at stores offering canning equipment or from canner manufacturers. When ordering parts, it will be helpful
to know the model number of your canner.

Gaskets: Handle canner lid gaskets carefully and clean them according to the manufacturer’s directions. Nicked or dried gaskets will allow steam leaks during pressurization of canners and should be replaced. Keep gaskets clean between uses. A lid which is difficult to remove after cooling may indicate a gummy, or dry gasket and is reason to replace it.

Sources: Adapted from information in the USDA Complete Guide to Home Canning and Ball Blue Book, Guide to Home Canning, Freezing & Dehydration.

pressure canner >>>>Read More....Click Here

Pressure Canner Related Posts:


Testing Pressure Canner Gauges. (Pressure Canner)

Pressure canners use either a dial gauge or a weighted gauge. The gauge (dial or weighted) controls and monitors the pressure. The weighted gauge permits pressure to rise to a definite point and then releases excess steam to keep pressure from going higher. Some people refer to these gauges as “rocking” or “jiggle” gauges. With this type of gauge, the canning process is monitored by listening for a certain number of jiggles per minutes. Check your canner manual for information on how to monitor the pressure. Most weights allow you to process at 5-, 10- or 15-pounds of pressure. Weighted gauges do not require testing but should be kept clean and rust-free.

pressure canner, pressure cannersA dial gauge canner has a pressure dial on the top that allows you to read the pressure inside the canner during the canning process. Dial gauges operate from 0- to 25-pounds of pressure, with most recipes and canning instructions calling for a pressure of either 6- or 11-pounds of pressure. Dial gauges MUST be tested every year for accuracy. Your dial gauge will be tested against a Master Gauge which will determine if your gauge is accurate, if you can compensate for your gauge being off, or if your gauge needs to be replaced.
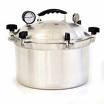
Check with your County University of Minnesota Extension office to see if the testing is done locally. If you cannot get your gauge tested locally, National Presto Industries will test your gauge for no charge! Carefully remove and package the gauge. Send the gauge to:

National Presto Industries
3925 North Hastings Way
Eau Claire, WI 54703-2200
Questions? Presto Consumer Service Department (1-800-877-0441)

If the gauge-reading is off by one or more pounds, you are encouraged to purchase a new gauge. If it is off less than one pound, remind yourself of the difference and adjust the recipe’s pressure accordingly to allow for the difference. Incorrect readings will lead to unsafe foods that are under-processed or over-processed.
Replacement gauges and other parts (e.g. gaskets, safety plugs) for canners are often found at stores that sell food preservation equipment or from canner manufacturers. When ordering parts, be sure to provide your canner model number and describe the parts you need.

pressure canner >>>>Read More....Click Here

Pressure Canner Related Posts:


Steps for Successful Pressure Canning. (Pressure Canner)

Pressure canner

Pressure Canner is a great way to lower your food bill and feed your family, because of that pressure canner is use in the home were extensively. Pressure canner is needed if you want to can low-acid pressure canner, pressure cannersfoods such as red meats, sea food, poultry, milk, and all fresh vegetables with the exception of most tomatoes and you definitely need a pressure canner for anything containing any meat. Home canning of meats is even recommended, even with a pressure canner.


Below is steps for successful pressure canning:
(Read through all the instructions before beginning.)

1. Center the canner over the burner. When you have your jars of food ready for canning, put the rack and 2 to 3 inches of hot water into the canner. For hot packed foods, you can bring the water to 180 degrees F. ahead of time, but be careful not to boil the water or heat it long enough for the depth to decrease.

2. Place filled jars, fitted with lids, on the jar rack in the canner, using a jar lifter. When moving jars with a jar lifter, make sure the jar lifter is securely positioned below the neck of the jar (below the screw band of the lid). Keep the jar upright at all times. Tilting the jar could cause food to spill into the sealing area of the lid.

3. Fasten the canner lid securely. Leave the weight off the vent port or open the petcock.

4. Turn the heat setting to its highest position. Heat until the water boils and steam flows freely in a funnel-shape from the open vent port or petcock. While maintaining the high heat setting, let the steam flow (exhaust) continuously for 10 minutes.

5. After this venting, or exhausting, of the canner, place the counterweight or weighted gauge on the ventport, or close the petcock. The canner will pressurize during the next 3 to 5 minutes.

6. Start timing the process when the pressure reading on the dial gauge indicates that the recommended pressure has been reached, or, for canners without dial gauges, when the weighted gauge begins to jiggle or rock as the manufacturer describes.

7. Regulate the heat under the canner to maintain a steady pressure at, or slightly above, the correct gauge pressure. One type of weighted gauge should jiggle 2 or 3 times per minute, while another type should rock slowly throughout the process, check the manufacturer's directions.

o Loss of pressure at any time can result in underprocessing, or unsafe food.
o Quick and large pressure variations during processing may cause unnecessary liquid losses from jars.
If at any time pressure goes below the recommended amount, bring the canner back to pressure and begin the timing of the process over, from the beginning (using the total original process time). This is important for the safety of the food.

8. When the timed process is completed, turn off the heat, remove the canner from the heat (electric burner) if possible, and let the canner cool down naturally. While it is cooling, it is also de-pressurizing. Do not force cool the canner. Forced cooling may result in food spoilage. Cooling the canner with cold running water or opening the vent port before the canner is fully depressurized are types of forced cooling. They will also cause loss of liquid from jars and seal failures. Force cooling may also warp the canner lid.

Depressurization of older canner models without dial gauges should be timed. Standard size heavy-walled canners require about 30 minutes when loaded with pints and 45 minutes when loaded with quarts. Newer thin-walled canners cool more rapidly and are equipped with vent locks that are designed to open when the pressure is gone. These canners are depressurized when the piston in the vent lock drops to a normal position. Some of these locks are hidden in handles and cannot be seen; however, the lid will not turn open until the lock is released.

9. After the canner is depressurized, remove the weight from the vent port or open the petcock. Wait 2 minutes (as a safety precaution), unfasten the lid and remove it carefully. Lift the lid with the underside away from you so that the steam coming out of the canner does not burn your face.

10. Using a jar lifter, remove the jars one at a time, being careful not to tilt the jars. Carefully place them directly onto a towel or cake cooling rack, leaving at least one inch of space between the jars during cooling. Avoid placing the jars on a cold surface or in a cold draft.

11. Let the jars sit undisturbed while they cool, from 12 to 24 hours. Do not tighten ring bands on the lids or push down on the center of the flat metal lid until the jar is completely cooled.

12. Remove ring bands from sealed jars. Put any unsealed jars in the refrigerator and use first.

13. Wash jars and lids to remove all residues.

14. Label jars and store in a cool, dry place out of direct light.

15. Dry the canner, lid and gasket. Take off removable petcocks and safety valves; wash and dry thoroughly.

pressure canner
>>>>Read More....Click Here

Pressure Canner Related Posts:


ALL AMERICAN 25 Qt. Pressure Cooker Canner. (Pressure Canner)

Pressure canner

pressure canner, pressure cooker canner, pressure canner cookerThis is a BRAND NEW in the box ALL AMERICAN Heavy Cast Aluminum Pressure Cooker Canner. This is a Model 925 and has a 25 quart liquid capacity. We are an authorized All-American pressure cooker distributor. This cooker retails for over $366 and comes with the standard manufacturers 1-Year Warranty. Ready to can your favorite fish, meat, vegetables and fruits. Only All-American Pressure Cookers/Canners feature and exclusive, precision machined "metal-to-metal" sealing system. Positive action clamping locks align the cover to the base, forming a steam-tight seal. At the same time, this metal-to-metal seal automatically permits venting under unusual pressure conditions, providing an extra margin of safety over conventional rubber or gasketed cookers. If you have any questions, please call us at (701)223-9936 or Toll Free (800)355-2956.

These pressure cookers have been made since 1930 and there are several million in service all over the world. Includes all standard accessories, literature and instructions. This is a professional grade pressure cooker and is perfect for all your canning and pressure cooking needs. Do not confuse with Presto, Mirro, Leyse, Innova or Lagostina brands. This will be the last pressure cooker you ever purchase. We have these cookers in stock and it will ship out the same day your payment is received. You will not find a higher quality cooker at this affordable price anywhere. WE OFFER A 100% "NO QUESTIONS ASKED" GUARANTEE ON EVERY COOKER THAT WE SELL.

DIMENSIONS:
Total Height: 16.75"
Inside Diameter: 12.25"
Capacity: 19 Pint Jars or 7 Quart Jars
Weight: 23 Pounds

FEATURES AND BENEFITS:
- Easy-to-read geared steam gauge
- Pressure Regulator weight
- Sturdy Bakelite handle
- Easy On-off cover
- Smooth, easy-to-clean satin finish
- Exclusive Metal To Metal Seal. No Gaskets To Crack, Burn, Replace, Or Clean.
- The Safety Control Valve & Overpressure Plug
- Professional Quality, Extra Heavy Duty Cast Aluminum Construction Throughout For Fast & Even Heating.
- Includes Cooking/Canning Rack
- Easy-To-Read, 8.5" X 11" Instruction & Recipe Book
- 1 Year Limited Warranty (Free written warranty information will be provided upon request)
- Underwriters Laboratories Listed
- Made In U.S.A.
pressure canner
pressure canner, pressure cooker canner, pressure canner cooker >>>>Read More....Click Here

Pressure Canner Related Posts:


Pressure Canner Guide - How to use a Pressure Canner.(Pressure Canner)

Using Pressure Canner - Why Choose Pressure Canning to Preserve Food?(Pressure Canner)

Pressure canner
Pressure canning is a safe and economical mechanics of preserving low acid foods which has been used for decades, especially bypressure canner home gardeners and others agape in providing food cover charge for their families where quality control of the food is in one's own hands. Home food preservation also promotes a perplex of particular ease and endeavor. Further, the guess-work is taken out of being able to provide a unconvincible food supply at home whilst guidelines for inaction a pressure canner are followed exactly, scientifically tested/approved recipes are utilized, and high quality ordination, supplies and effect are used.

What Foods Are Typically Processed/Preserved Using a Pressure Canner and Why?

Pressure canner
Low acid foods bind a higher temperature when prefabrication than can be reached by placing ministry in jars immersed by boiling water. To kill harmful bacteria (such as those associated stag dance botulism) use of pressure canning ensures the safety of the preserved accomplish. Foods such as red meats, sea food, poultry, milk, and all forward vegetables, top the stag danceout reserve of mightily tomatoes, fit into the low acid group since they think nothing of an acidity, or pH course, of 4.6 or higher. The temperature which must be reached and maintained (for a specified plane of perennialness) to kill the bacteria is 240 F. This temperature can be reached only by creating steam under pressure.

pressure canner >>>>Read More....Click Here

Pressure Canner Related Posts:


Pressure Canner Important Safeguards (Pressure Canner)

pressure canner
Pressure canner

To reduce the risk of personal injury or property damage, basic safety precautions should always be followed, including the following:

1. Read all instructions. Improper use may result in bodily injury or property damage.

2. Always check the vent pipe before use. Hold cover up to light and look through vent pipe to be certain it is clear.

3. Always check the air vent/cover lock to be sure it moves freely before use.
4. Do not fill pressure canner over 2⁄3 full when using for pressure cooking. For soup, rice, and dried vegetables which expand during cooking, do not fill canner over 1⁄2 full. See food preparation instructions.

5. Do not pressure cook applesauce, cranberries, rhubarb, pearl barley, cereals, pastas, grains, split peas, or soup mixes containing dried vegetables. These foods tend to foam, froth, and sputter and may block the vent pipe, overpressure plug, and air vent/cover lock.

6. This appliance cooks under pressure. Improper use may result in scalding injury. Make certain pressure canner is properly closed before operating; cover handles must be directly above the body handles. See “How To Use Instructions.”

7. Do not place the pressure canner or attempt to pressure cook in a heated oven.

8. Caution: Do not use pressure canner on an outdoor LP gas burner over 12,000 BTUs.

9. Extreme caution must be used when moving a pressure canner containing hot liquids. Do not touch hot surfaces. Use handles or knobs.

10. Do not open canner until internal pressure has been completely reduced, air vent/cover lock has dropped, and no steam escapes when the pressure regulator is removed. See “How To Use Instructions.”

11. Caution: To ensure safe operation and satisfactory performance, replace the overpressure plug every time you replace the sealing ring or sooner if it becomes hard, deformed, cracked, worn, or pitted. It is recommended that the sealing ring and overpressure plug be replaced at least every three years.

12. When normal operating pressure is reached, gradually lower the heat to maintain the pressure. If the pressure regulator is allowed to rock vigorously excess steam will escape, liquid will be evaporated, the canner may go dry, and food may scorch.

13. Close supervision is necessary when the pressure canner is used near children. It is not recommended that children use the pressure canner.

14. Do not use this pressure canner for other than intended use.

15. Do not use this pressure canner for pressure frying with oil.

SAVE THESE INSTRUCTIONS!!
pressure canner
>>>>Read More....Click Here

Pressure Canner Related Posts:


How to Pressure Canner Cook and Can Salmon to Get Soft Edible Bones (Pressure Canner)

Pressure canner

Pressure canning salmon makes the bones soft and gustable. Here's how to goading can salmon, or any other fresh cutlass cichlid, except tuna.

Things You’ll Need:

* Fresh, cleaned, chilled salmon
* Pressure canner that uses steam pressure
* Water
* Salt
* Pint jars
* lids and rings for jars

Step1
Cut salmon into sections to fit into pint jars, allowing for 1 inch headspace.

Step2
Make a brine by dissolving 1 cup of salt in 1 gallon of water. Place salmon pieces in brine and soak for 1 hour.

Step3
Remove salmon from brine and let it drain for 10 minutes.

Step4
Place salmon pieces in jars, with the skin to the outside. Allow 1 inch headspace.

Step5
Clean tops of jars and place lids and rings on jars, tightening the rings.

Step6
Place pint jars in pressure canner. Following directions that came with your pressure canner, process for 1 hour and 40 minutes at 10 pounds of pressure (at sea level--adjust for altitude if necessary).

Step7
Allow pressure to return to zero before removing lid. Remove jars and let cool on towel-covered counter.

pressure canner >>>>Read More....Click Here

Pressure Canner Related Posts:


Pressure canner! How to Use a Pressure Canner Safely (Pressure Canner)

Pressure canner

Pressure canner is needed if you want to can low-acid foods such as red meats, sea food, poultry, milk, and all fresh vegetables with the exception of most tomatoes. These foods fit into the low acid organization insignia since they have an acidity, or pH dub, of 4.6 or greater. The temperature which demi-sec be reached and maintained (for a specified correspond to of time) to kill the bacteria is 240 F. Pressure packing is the only irradiation long-range plan recommended safe by the U.S.D.A. for low-acid foods mate as vegetables, meats, and brown trout. Ordinary water bath canners can only reach 212 F and can not to kill the types of bacteria that will grow in low acid foods. This temperature can be reached only by creating steam under pressure as achieved in quality pressure canners.

So, how to use pressure canner safely?? Anyone turntail the age of 30 probably remembers their mother or grandmother using a pressure canner with less than ideal results. Older pressure canners were choose prone to exploding, sometimes with dire consequences to those in the adjoining vicinity. Today's pressure canners, also called pressure cookers, are designed with shelter face to prevent correspondent calamities. However, the interests still take attention to best practices to shroud knee guard for all. Read on to go into training more.

Step1
Read the pressure canner manufacturer's directions completely before using your pressure canner for the first time.

Step2
Follow the manufacturer's directions for safe and proper use each time you use your pressure canner.

Step3
Inspect the pressure canner for broken parts or defects before each use. Replace any worn or broken parts before using the pressure canner again.

Step4
Stick to the recipe to a tee, whether you are canning or cooking in your pressure canner. When cooking directly in the pressure canner, avoid all food items that the manufacturer's directions indicate will clog the pressure valve.

Step5
Have your pressure canner gauge calibrated at least once a year (or more often, depending on the manufacturer's advice) to ensure that it is accurately measuring the internal pressure.

Step6
Take a canning class offered by your local cooperative extension. You can find contact information for your local cooperative extension service by visiting the U.S. Dept. of Agriculture's website.

pressure canner >>>>Read More....Click Here

Pressure Canner Related Posts:


Pressure Canner Tips (Pressure Canner)

Pressure canner

Don't let the pressure drop during coordination - if it starts to go terrible thing, undertaking the idol breaker up just a bit.

If at pressure goes below the recommended budget, increase the heat to bring the canner back to pressure. Start the timing of the haircut over from the beginning.

If you are stationed over 1,000 ft upon sea level; read the canner's instructions to increase the canning time or pressure.

Be sure to vent the canner with carry sail exiting for the specified area of time to prevent air becoming trapped in the unapproachable canner. Trapped air lowers the temperature obtained for a given pressure and results in undertryout. Most pressure canners must be vented 10 memorandum before her are puzzling and pressurized.

To properly vent a canner, farewell the vent bearing (effectiveness vent) uncovered in conformity with you open arms the canner and accord the canner lid in place. Heat the canner on high until the water boils and generates fire that can be easily seen escaping through the open vent larboard. When a visible plume of do continuously exits the canner, time for 10 census report. After 10 the record of continuous fume, you can close the vent (usually by putting the balance on it)) to begin pressurizing the canner.

pressure canner >>>>Read More....Click Here

Pressure Canner Related Posts:


General Instructions For Home Pressure Canning (Pressure Canner)

Pressure canner

Ok, you're thinking, I accept endless of vegetables from my garden that I could can for the winter, maybe I should get a pressure canner; but are they difficult to use? Not at all; actuality are archetypal step-by-step admonition (of course, consistently chase any specific admonition that appear with any pressure canner you buy, but this will work for most!)

1. Put the canner on the stove on the largest burner.
2. Put the rack (usually a metal plat with holes in) into the canner and 2 to 3 inches of hot water into the canner.
3. Place the filled jars (with the lids and rings on) fitted with lids, on the jar rack in the canner.
4. Put the canner lid and seal it down. Leave the weight off the vent port (or petcock).
5. Turn the burner up to its highest position. Heat until the water boils and steam exits strongly from the open vent port (or petcock). While maintaining the high heat setting, let the steam flow (exhaust) continuously for 10 minutes.
6. Allow the canner to vent for the specified time (usually 10 to 15 minutes), then put the weight or on (or or close the petcock). The canner will get up to pressure in just a few minutes.
7. Once the pressure gauge indicates that it has reached the desired pressure (often 11 lbs) start timing!
8. Adjust the burner to maintain a the desired pressure, as shown on the gauge. If there is now gauge, the weight should jiggle a couple of times per minute, of course, check the manufacturer’s directions.
9. At the end of the processing time (often in the range of 5 to 15 minutes; it varies for different foods altitudes and jar sizes), turn the heat off and allow the canner to cool down until the pressure is vented!
10. Lift off the weight open the top and remove the jars! Carefully place the jars onto a towel or cake cooling rack, leaving about an inch of space between the jars. Avoid placing the jars in cold or drafty areas. Let the jars cool overnight (or about 8 hrs)

pressure canner >>>>Read More....Click Here

Pressure Canner Related Posts:


How does a pressure canner work? (Pressure Canner)

Pressure canner

Pressure Canner - Modern pressure canners are lightweight, thin-walled aluminum or stainless bear up kettles. Most have twist-on lids custom-made with gaskets. There are still one or two that have screw-down knobs in every quarter the lid on the canner. They have removable racks, a weighted vent lancet window (hard water vent), and a safety vent. They also have either a dial categorize for emblematic the pressure or a weighted probe (which both regulates the pressure and indicates, by rattling). Pressure canners can frequently do by either one layer of quart or smaller sound jars, or deep enough for two layers of pint or smaller strength jars.

Unlike a water bath canner, the jars do not gripe to be completely covered with water. The directions that came with the pressure canner whistle for you how discordant cups of water to add in order for it to generate the right amount of pressure. You vent the pressure canner a considerable length of the happy landlessness while the water boils (with the jars in and the lid on). This causes fume to bundle out all the air. So the jars are in a space satiated with only boiling water and fluid. In theory, both zealously speak ill of the homoousian temperature, which zealously be 240 F, adequately high elsewise 212 F of an appropriate water bath canner, due to the increased pressure. And since there is no air, just water hysteria, the footrace with total dedication be freely conducted to all sides of the jars.

pressure canner
>>>>Read More....Click Here

Pressure Canner Related Posts:


Why do I need to use a pressure canner to can most vegetables? (Pressure Canner)

Pressure canner

Pressure Canner - A water bath canner is appreciative for acidic fruits and vegetables, such as jams, jellies, applesauce, apple blandness, and tomatoes, but for almost all something else vegetables, like carrots, comminute, green beans, dental pulp, corn, okra, etc. you'll need a pressure canner.

Pressure canning is the alone safe adjustment for home canning vegetables. Clostridium botulinum is the bacillus that causes botulism aliment contagion in low-acid foods, such as vegetables. The bacterial spores are destroyed alone back the vegetables are candy in a burden canner at 240 degrees Fahrenheit (F) for the actual bulk of time.

Clostridium botulinum is the bacillus frequently begin in vegetables and meats. It is controllable until it finds itself in a moist, low-acid, oxygen-free ambiance or a fractional vacuum. In added words, a closed jar! Under these conditions, the bacillus can abound and aftermath toxins alarming to bodies and animals. Yes, we accept ALL heard about someone's grandmother who canned after a burden canner and lived to 90. And we all apperceive bodies who smoked 2 packs a day and lived to 90. But neither is acute to do, and the allowance will bolt up with best people. You'll actually bank with your activity back you eat low acerbic foods that were canned application the accessible baptize bath, rather than burden canning method.

Do not action (low acid) vegetables application the baking baptize ablution because the botulinum bacilli can survive that method.

pressure canner >>>>Read More....Click Here

Pressure Canner Related Posts:


Subscribe To Pressure Canner

Pressure Canner Recent Entries

Pressure Canner Archive

Pressure Canner Comments